I wholeheartedly believe that breakfast is better when potatoes are involved. Crispy Breakfast Potatoes are a favourite in our house. Nestled alongside some eggs and bacon, you’ve got yourself the most perfect breakfast. But while regular potatoes are great and all, the sweet potato has my heart in a HUGE way. And I knew I had to try and find a way to incorporate it into a breakfast dish. Enter the Sweet Potato Rosti. Or Sweet Potato Hash Brown. You can really call it either! This vegetarian sweet potato rosti recipe is made with halloumi cheese which adds so much flavour. You can serve the rosti as is or my favourite - top them with some smashed avocado, a fried egg and even some bacon. Breakfast heaven! And just a quick word of advice - you will be left with some unused halloumi after making this (you only need half a standard block) and you should DEFINITELY use it to make these Zucchini and Halloumi Fritters for dinner. They are AMAZING and you won’t be sorry.
What’s the difference between a rosti and a hash brown?
Not a lot. In fact, you can call these sweet potato rosti or hash browns. Rosti is a traditional Swiss dish of grated potato that is rolled into a small flat cake and fried. Hash browns are a popular American dish, and are made in a similar fashion to a rosti. Traditionally the difference between the two was that hash browns were made with potato that was already cooked. These days, however, both rosti and hash browns are cooked in very similar ways that you can use the terms interchangeably.
WHAT YOU’LL NEED
This sweet potato rosti recipe is filled with everyday ingredients. If you’re having trouble finding halloumi cheese in your supermarket, try your local Mediterranean deli.
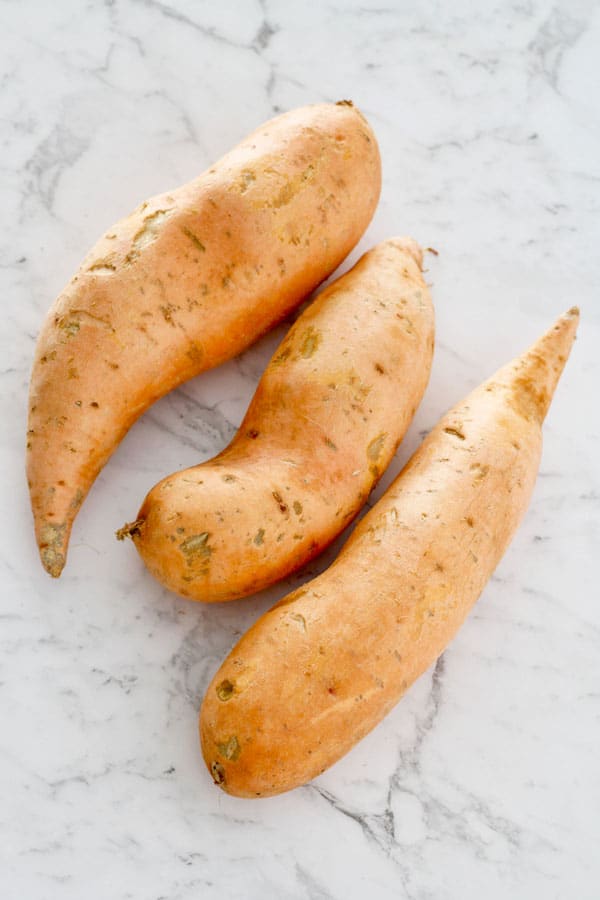
Sweet Potato Green Onions / Shallots Halloumi Cheese Egg Whole-Wheat / Wholemeal Flour - OR you can use white all purpose flour or almond flour if you’d prefer. Garlic Powder Cumin Olive Oil - OR you can use coconut oil if you’d prefer.
SWEET POTATOES - SKIN ON OR OFF?
Whether you peel your sweet potato before grating it for the rosti is up to you. I personally almost always leave the skin on when cooking with sweet potatoes. The skins of sweet potatoes contain a number of additional nutrients and vitamins, including fibre, beta carotene and vitamin C & E. They are 100% safe to eat, you just need to ensure you wash and scrub them well first to remove any dirt.
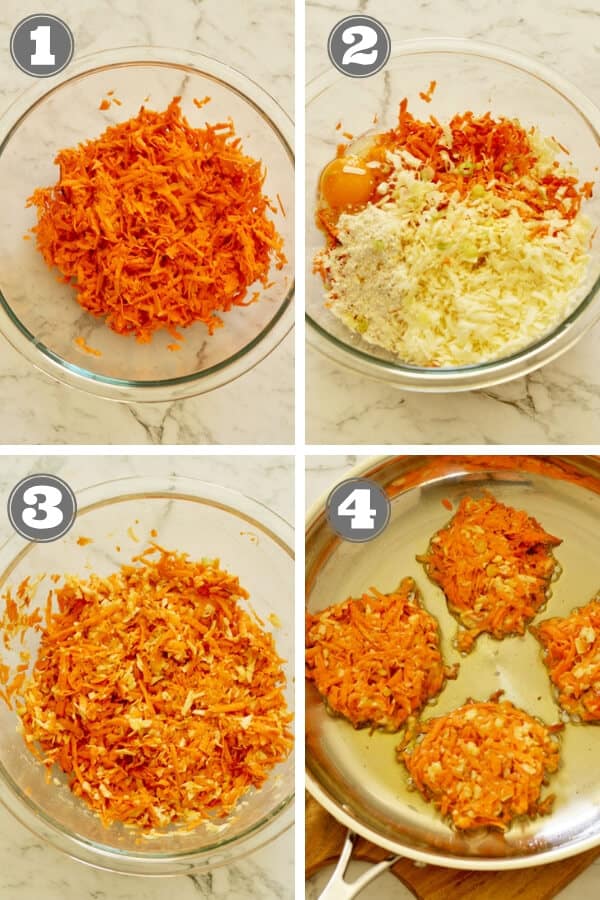
HOW TO MAKE SWEET POTATO ROSTI - STEP BY STEP
HOW TO STORE SWEET POTATO HASH BROWNS
Rosti are similar to fritters and are at their best when eaten straight away when they are crisp and golden. They are still delicious when reheated, but they often lose that crispiness and become a little softer. This has never bothered me, and I regularly eat my leftovers over the next few days and thoroughly enjoy them regardless of if they are as crisp or not.
IN THE FRIDGE:
Store rosti in an airtight container in the fridge for up to 3 days.
IN THE FREEZER:
Individually wrap rosti in cling wrap / plastic film, then pop in an airtight container or freezer bag and store for up to 1 month. Thaw overnight in the fridge when you’re ready to use and follow the reheat instructions below.
HOW TO REHEAT ROSTI
Heat oven to 180C / 350F. Pop rosti on a baking tray lined with baking paper or a silicon mat, and place tray in the oven for 10 minutes, or until rosti is heated all the way through. You can reheat in the microwave, although, I find this method makes the rosti soft and soggy and I don’t recommend it.
Tips for making this recipe
Make sure you squeeze the excess moisture out of the sweet potato. This step helps avoid sogginess. If you find the mixture is too wet and not holding, add in a teaspoon of flour and mix again. Continue, if necessary, until you reach your desired consistency. You need enough oil to just cover the bottom of your frying pan. Make sure it’s hot before popping the rosti into the pan. Cold oil will absorb into the rosti and make them soggy. Cook the rosti in batches, about 3-4 at a time so you don’t overcrowd your pan.
MORE TASTY BREAKFAST RECIPE INSPIRATION
25 Quick and Healthy Breakfast Recipes Banana Porridge Chocolate Chia Pudding Apple Cinnamon Oatmeal Honey Almond Granola OR see all Breakfast Recipes
If you’ve tried these Sweet Potato Rosti I’d love to hear how you enjoyed them! Pop a comment and a star rating below! You can also FOLLOW ME on FACEBOOK, INSTAGRAM and PINTEREST to keep up to date with more delicious recipes. INGREDIENT SUBSTITUTIONS:
Whole-Wheat / Wholemeal Flour - You can use white all purpose flour or almond flour if you’d prefer.Olive Oil - You can use coconut oil, or another frying oil, if you’d prefer.
TIPS FOR MAKING SWEET POTATO ROSTI
HALLOUMI - You’ll find packaged halloumi cheese in specialty cheese sections at most major supermarkets. If you’re having trouble tracking it down, you can always try a local Mediterranean deli.
SWEET POTATO - Grate with or without the skin - it’s up to you! If you’re leaving the skin on, make sure you give it a good wash first. EXCESS MOISTURE - Make sure you squeeze the excess moisture out of the sweet potato. This step helps avoid sogginess. COMBINING THE MIXTURE - If you find the mixture is too wet and not holding, add in a teaspoon of flour and mix again. Continue, if necessary, until you reach your desired consistency. COOKING ROSTI - You need enough oil to just cover the bottom of your frying pan. Make sure it’s hot before popping the rosti into the pan. Cold oil will absorb into the rosti and make them soggy. COOKING IN BATCHES - Cook the rosti in batches, about 3-4 at a time so you don’t overcrowd your pan. STORING - Pop leftovers in an airtight container in the fridge for 3 days OR individually wrap in cling wrap / plastic film and place in airtight container or freezer bag in the freezer for a month. Thaw rosti in the fridge overnight when ready to use. REHEATING - Preheat oven to 180C / 350F, place rosti on a baking tray lined with baking paper / silicon mat and pop in oven for 10 minutes or until the rosti is heated all the way through. UPDATES - First Published August 28, 2018. Last Updated March 18, 2019 – no changes to the recipe, just updated with more photos, tips and tricks.

